I used to have a domain called “hacktheplanet.eu” where I collected useful tips and tricks for my every day needs, I kind of miss that place so here we go again, it’s time for a new page with my every day useful tips to make my own life easier!
a bunch of tips and tricks
Mac Calendar is … almost great!

I’ve been using the Mac Calendar app for so many years, it’s one of my favorite applications on Mac that helps me manage multiple calendars, work, private, shared, all in one place! But.. and that is a big BUT, the Exchange Sync in the Mac Calendar App has for many years been quite unreliable, it works and then it just stops working without any indication of a problem, the solution for me has always been to restart the “exchangesyncd” service in MacOS manually and move on with my life.
But I got tired of finding my Mac Calendar being “out of sync”, so I decided to automatically restart the Exchange Sync – Service every morning at 06:00, and guess what? I haven’t had any issues since!
Here is how you do it…
Open your Terminal and create a .plist file under “~/Library/LaunchAgents/” and name it something appropriate like, “com.user.restart_exchangesyncd.plist”.
Add the following to that file (edit the label if needed):
<?xml version="1.0" encoding="UTF-8"?>
<!DOCTYPE plist PUBLIC "-//Apple Computer//DTD PLIST 1.0//EN"
 "http://www.apple.com/DTDs/PropertyList-1.0.dtd">
<plist version="1.0">
<dict>
    <key>Label</key>
    <string>com.user.restart_exchangesyncd</string>
    <key>ProgramArguments</key>
    <array>
        <string>/bin/bash</string>
        <string>-c</string>
        <string>launchctl stop exchangesyncd; launchctl start exchangesyncd</string>
    </array>
    <key>StartCalendarInterval</key>
    <dict>
        <key>Hour</key>
        <integer>6</integer>
        <key>Minute</key>
        <integer>0</integer>
    </dict>
    <key>RunAtLoad</key>
    <true/>
</dict>
</plist>
And edit the “hour and minute” attributes to what ever suits your needs.
Then in order to activate the restart, make sure to load the .plist.
launchctl load ~/Library/LaunchAgents/com.user.restart_exchangesyncd.plistThat’s it! You’re done!
This old thing? It’s just Awesome!

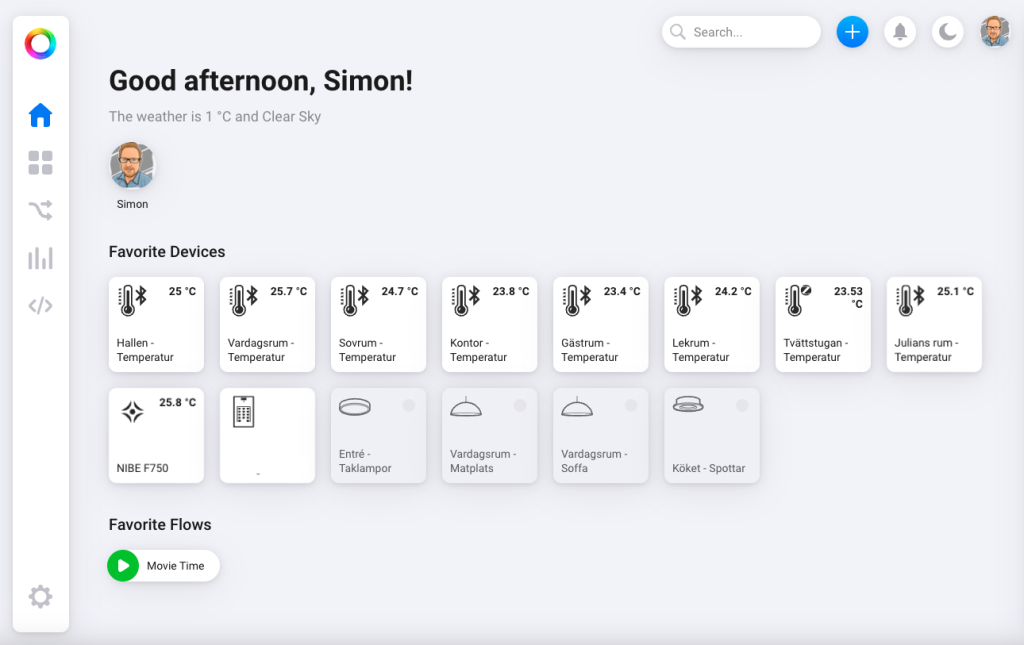
After my friend (@pjocke) had some issues with his heating and started monitoring the incoming hot water from the tenants association, I thought it would be nice to monitor the temperature in _all_ the rooms of my house…
I use Homey for my home automation, and was looking for something that would plug in to that. So after some researching I found out that Xiaomi Mi Smart Home Temperature / Humidity Sensor 2 works great with Homey, but it needs to be flashed with a custom firmware since they are (of course) supposed to only work with Xiaomis own “Mi Home”-app.
Well, said and done, I bought some sensors and started the process, found out the hard way that my Browser (Brave) needed to enable some experimental flags to use the Web Bluetooth API.
Since then there has been new firmware releases and it’s now also possible to flash the sensors with a firmware that enables Zigbee.
Just look at it…

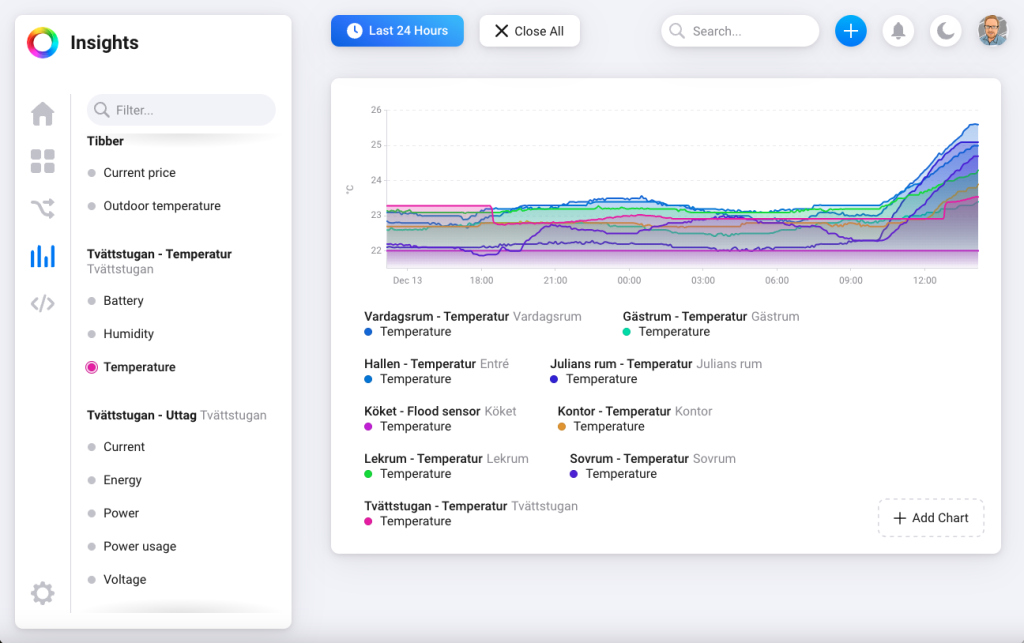
And with Insights in Homey, I can generate nice graphs showing the sun factor on the room’s facing south..

Next step.. MORE SENSORS! (…and perhaps some cool automation based on the output of the sensors!)
Sendgrid
Sendgrid is the cause of nightmares, it’s not uncommon that customers use Sendgrid, and it’s quite understandable with a “free tier” that allows you to send e-mails from your application for free.
But what Sendgrid lacks is proper Spam-mitigation, since Sendgrids entry level “free tier” and their first level of payed service uses a shared service platform, this means that it only takes one of Sendgrids customers to misbehave (and they do!) for all other customers using that same tier to be affected, causing e-mails to be blocked by the customers spam-mitigation filters or even worse being blacklisted for extended periods.
The solution in the Sendgrid world, is to upgrade to their highest tier, currently at ~90 USD per month. But why did we get stuck here? Well it was because of the free tier in the beginning, because ~90 USD per month, is quite pricy when alternative services pricing starts around 8 USD per month (depending on volume).
Confluence – Export PDF Template
I spent the good part of a sunday afternoon to play around with the Export to PDF function in Confluence, and this is my finished stylesheet. Inspired by various online sources…
body {
font-family: Arial, sans-serif;
font-size: 12pt !important;
letter-spacing: normal;
}

*|h1 {
font-family: Arial, sans-serif;
font-size: 44pt !important;
letter-spacing: normal;
}

*|h2 {
font-family: Arial, sans-serif;
font-size: 34pt !important;
letter-spacing: normal;
}

*|h3 {
font-family: Arial, sans-serif;
font-size: 24pt !important;
letter-spacing: normal;
}

*|h4 {
font-family: Arial, sans-serif;
font-size: 16pt !important;
letter-spacing: normal;
}

.pagetitle h1 {
font-family: Arial, sans-serif;
font-size: 50pt !important;
margin-left: 0px !important;
padding-top: 150px !important;
page-break-after: always;
}

@page {
size: 210mm 297mm;
margin: 15mm;
margin-top: 20mm;
margin-bottom: 15mm;
padding-top: 15mm;
font-family: Arial, sans-serif;

.pagetitle {
page-break-before: always;
}

@top-right {
background-image: url("wiki/download/attachments/127662/Logotype-Company-Digital-black.png");
background-repeat: no-repeat;
background-size: 80%;
background-position: bottom right;
}

/* Copyright */
@bottom-left {
content: "Company AB";
font-family: Arial, sans-serif;
font-size: 8pt;
vertical-align: middle;
text-align: left;
letter-spacing: normal;
}

/* Page Numbering */
@bottom-center {
content: "Page " counter(page) " of " counter(pages);
font-family: Arial, sans-serif;
font-size: 8pt;
vertical-align: middle;
text-align: center;
letter-spacing: normal;
}

/* Information Class */
@bottom-right {
content: "Information Class: Restricted";
font-family: Arial, sans-serif;
font-size: 8pt;
vertical-align: middle;
text-align: right;
letter-spacing: normal;
}

/* Generate border between footer and page content */
border-bottom: 1px solid black;

/* end of @page section */
}

/* Insert page-break at each divider in the page */
hr {
page-break-after:always;
visibility: hidden;
}

/* Fix tables breaking outside the print-area */
table.fixedTableLayout {
    table-layout: fixed !important;
    width: 80% !important;
}

div.wiki-content {
width: 150mm !important;
margin: 0px 10mm 0px 10mm !important;
}

body,div,p,li,td,table,tr,.bodytext,.stepfield  {
font-size: 11pt !important;
letter-spacing: normal;
word-wrap: break-word;
}
Is Microsoft running out of capacity?

When we talk about Cloud and Cloud Services, most people imagine “unlimited resources at your disposal”, and sure in most situations the capacity of the cloud providers are sufficient to make you feel like you have unlimited resources (if you ignore things that is already in place to stop you from consuming all the resources, like account limitations…) but that might have to change…
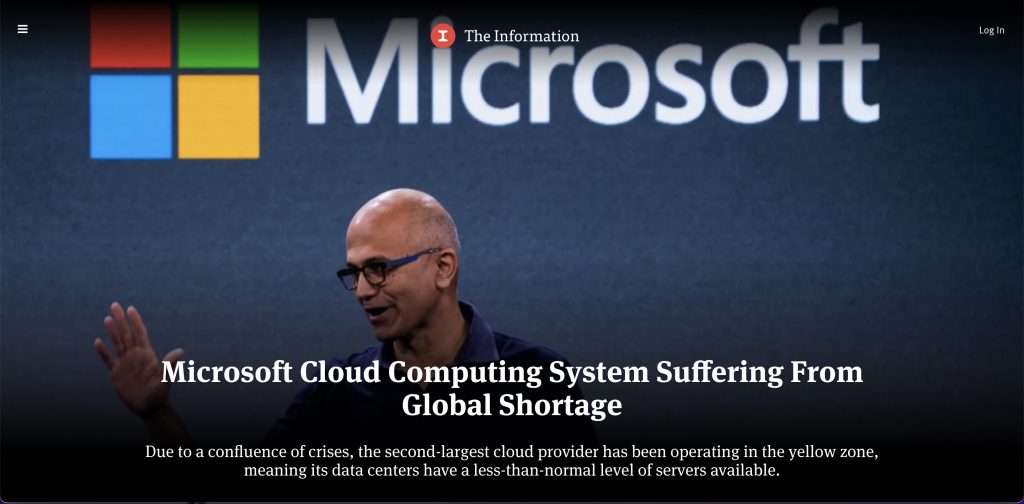
According to TechSpot and The Information, Microsofts Cloud Service: Azure, is currently operating at reduced capacity and this might mean that certain services are no longer available to the users, or you are limited in the amount of services you are allowed to deploy.
The reason behind this, according to the news sites, is again, the global chip shortages.
Turn on and off your AKS (Azure Kubernetes)!
Turning off your AKS will reduce cost, since all your nodes will be shut down.
Turning it off:
Stop-AzAksCluster -Name myAKSCluster -ResourceGroupName myResourceGroupAnd then turning it back on:
Start-AzAksCluster -Name myAKSCluster -ResourceGroupName myResourceGroupIf your an Azure N00b like me, and you get “Resource Group not found”, change into the correct subscription using either name or id, with:
Select-AzSubscription -SubscriptionName 'Subscription Name'or
Select-AzSubscription -SubscriptionId 'XXXX-XXXXX-XXXXXXX-XXXX'Thats it for today!
Migrating from Authy to 1Password
I’ve previously used LastPass and Authy, but have decided to start using 1Password instead as their app is nicer and they have many features that are not available natively on the LastPass Desktop App or Browser Extention, like 2FA.
But how to migrate without having to re-setup 2FA on every site?
After trying out some javascript-browser-hacks without much luck, I found a Go Lang written program that uses the Device-feature of Authy to get access to the TOTP-secrets, works like a charm as they say!
Here’s a link to the program:
Recursive unrar into each folder…
I’m not sure why this was so hard to find, but now it’s working… I was initially working on having “find” -exec UnRAR but it didn’t seem to work too well (I couldn’t find a good one-liner to separate file directory and full-filename to put into the find -exec command, if you have one, let me know).
#!/bin/bash
find $PWD -type f -name '*.rar' -print0 |
while IFS= read -r -d '' file; do
dir=$(dirname "$file")
	unrar e -o+ "$file" "$dir"/
done(some parts of the script was inspired from other online sources)
That oneliner…
Once again, this is just so that I don’t forget 🙂
apt -y update && apt -y upgrade && apt -y dist-upgrade && apt -y autoremove && apt -y clean && apt -y purge && rebootBecause you just want keep your system updated … I’m sure some of the commands are redundant, but hey.. It works!
Manipulating “date added” in the Plex Media Server Database
So I noticed a quite annoying thing in my Plex Server, some items were always marked as “recently added”. As usual, I went online and searched for a solution.
Some posts suggested to wipe the library and start over, while some posts suggested that doing that doesn’t fix the problem as the “bug” seems to be that when an initial scan is done, some times Plex will add a “date in the future” as the “added date”.
So I got curious, I started looking at the XML-file of the Items in question, and just as described in one of the posts, the year of the added-date, was in 2037 a fair bit into the future.
I started looking for solutions to the problem and trying to find someone who had been able to fix it, when I stumbled upon a reddit post with a SQL-script.

So I started by downloading the Plex SQLite3 Databases from my Plex Server (making sure to make backups of the original files…), I then downloaded a SQLite3 Database Tool to my computer and started exploring the database structure.
After looking around, it seemed like the 4 year old Script found on Reddit would do what I wanted, so I modified it to work on my Library and ran it.
After that I uploaded the DB-files to my Plex Media Server and started it, problem solved!
Reddit article: bauerknights post
SQL Oneliner for future use:
UPDATE metadata_items SET added_at = originally_available_at where library_section_id = '5' and added_at >= '2020-08-29 00:00:00'
